Container Management
Containers are the core concept of Docker, being running instances of images. Through the container management page, you can create, start, stop, and manage containers.
Container List
Go to the Container page, which displays the container list by default.
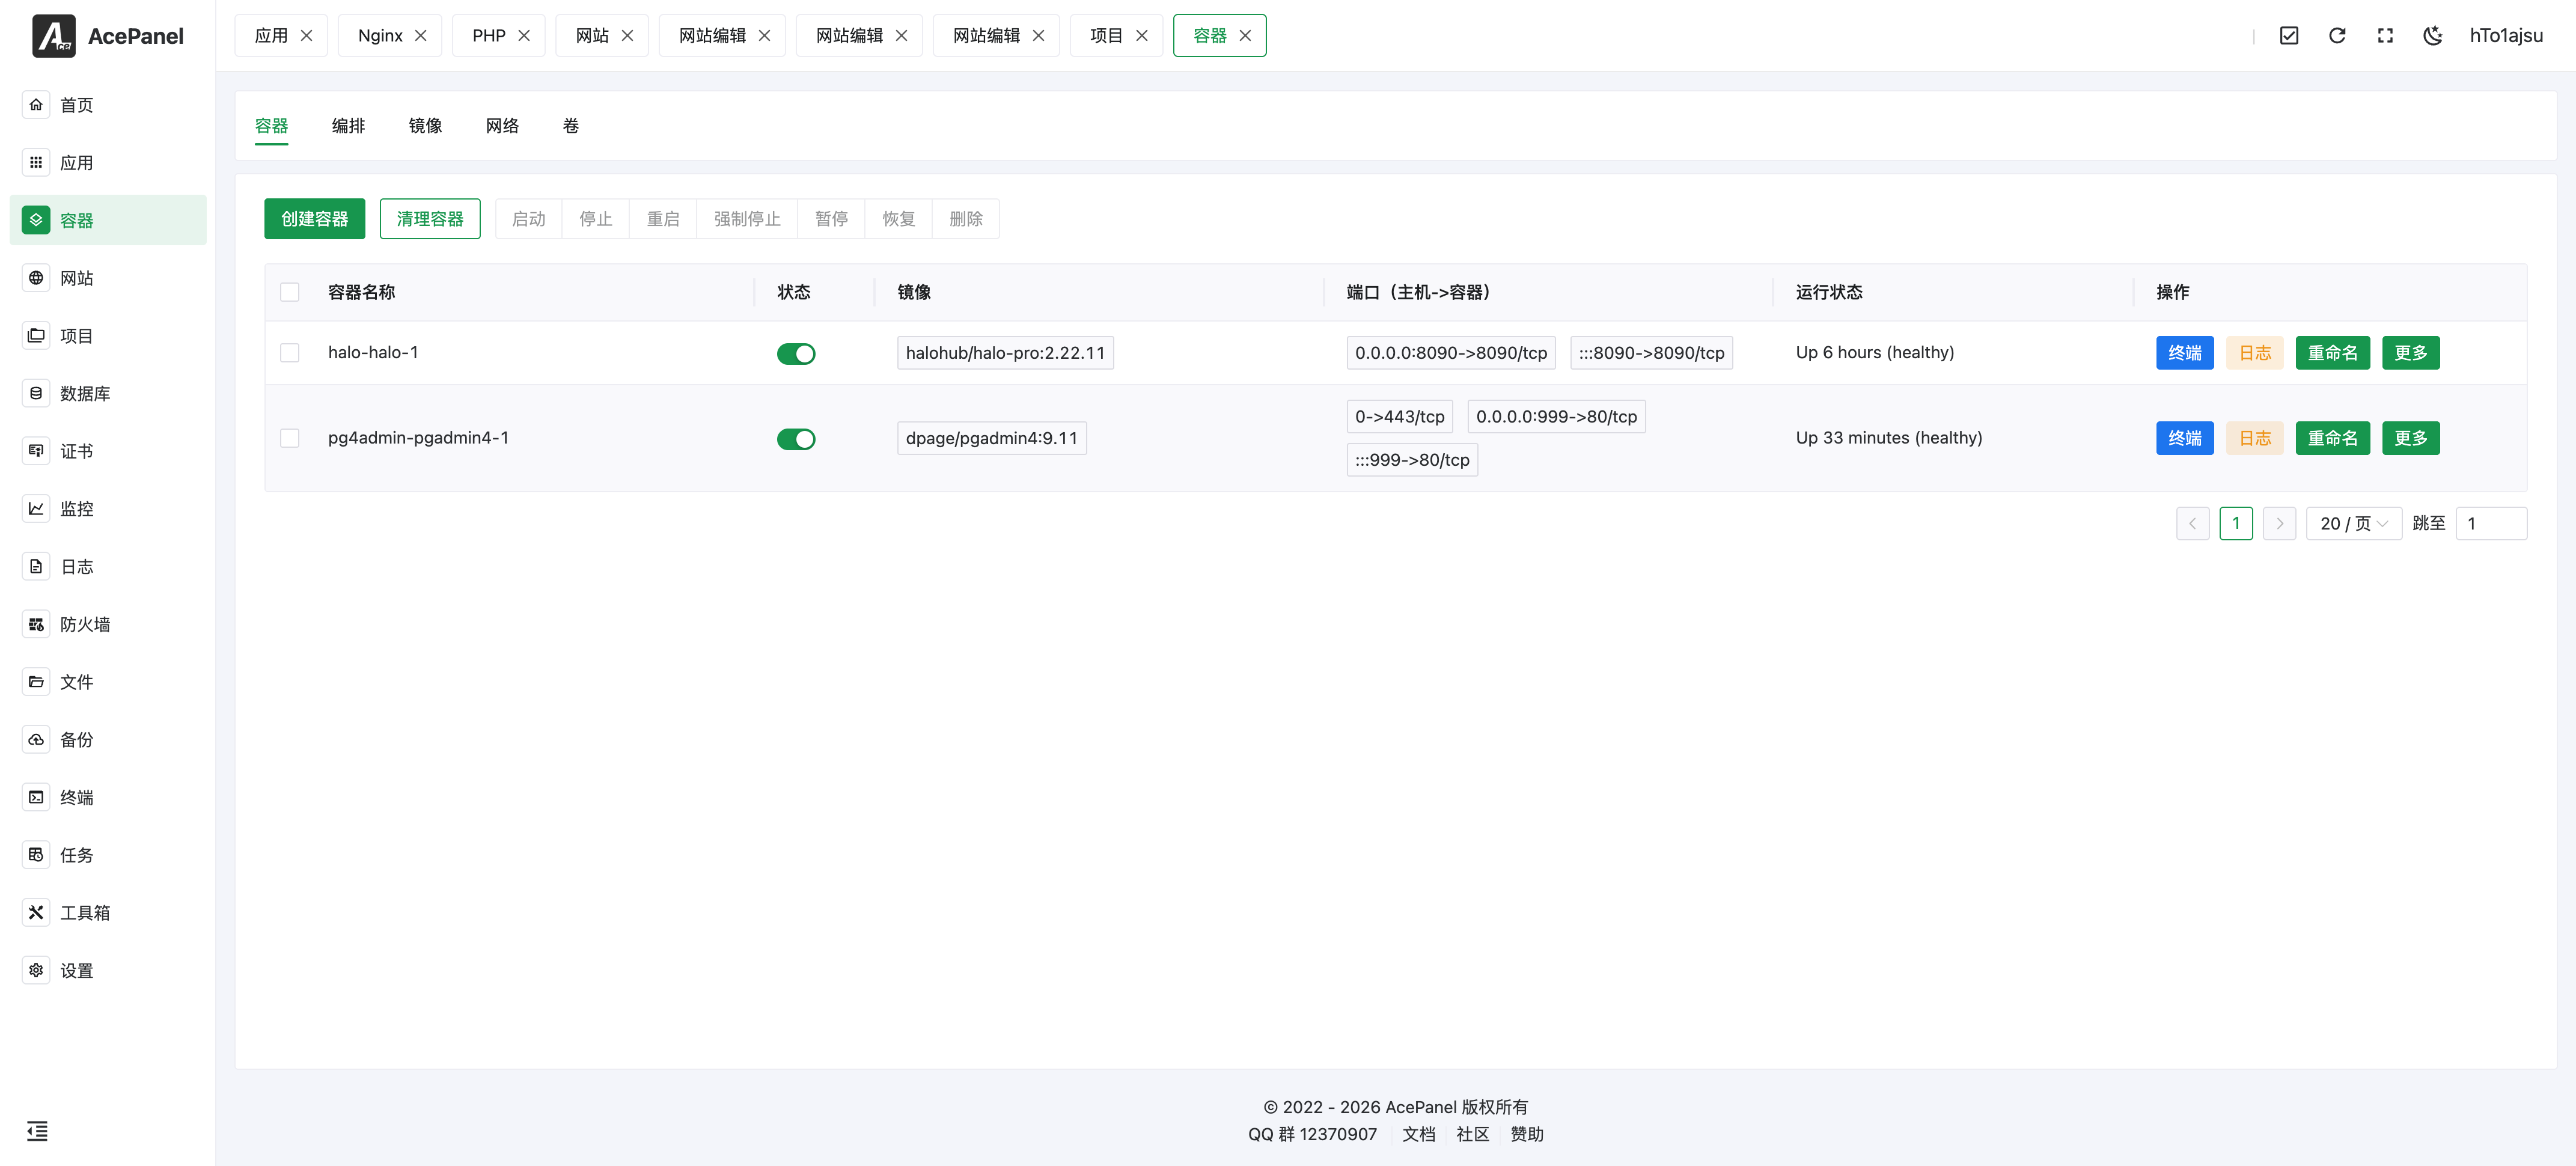
The list displays the following information:
- Container Name: Name of the container
- Status: Running status switch
- Image: Image used by the container
- Ports: Port mapping (host port -> container port)
- Running Status: Detailed running status information
- Actions: Terminal, logs, rename, etc.
Create Container
Click the Create Container button to open the creation dialog.
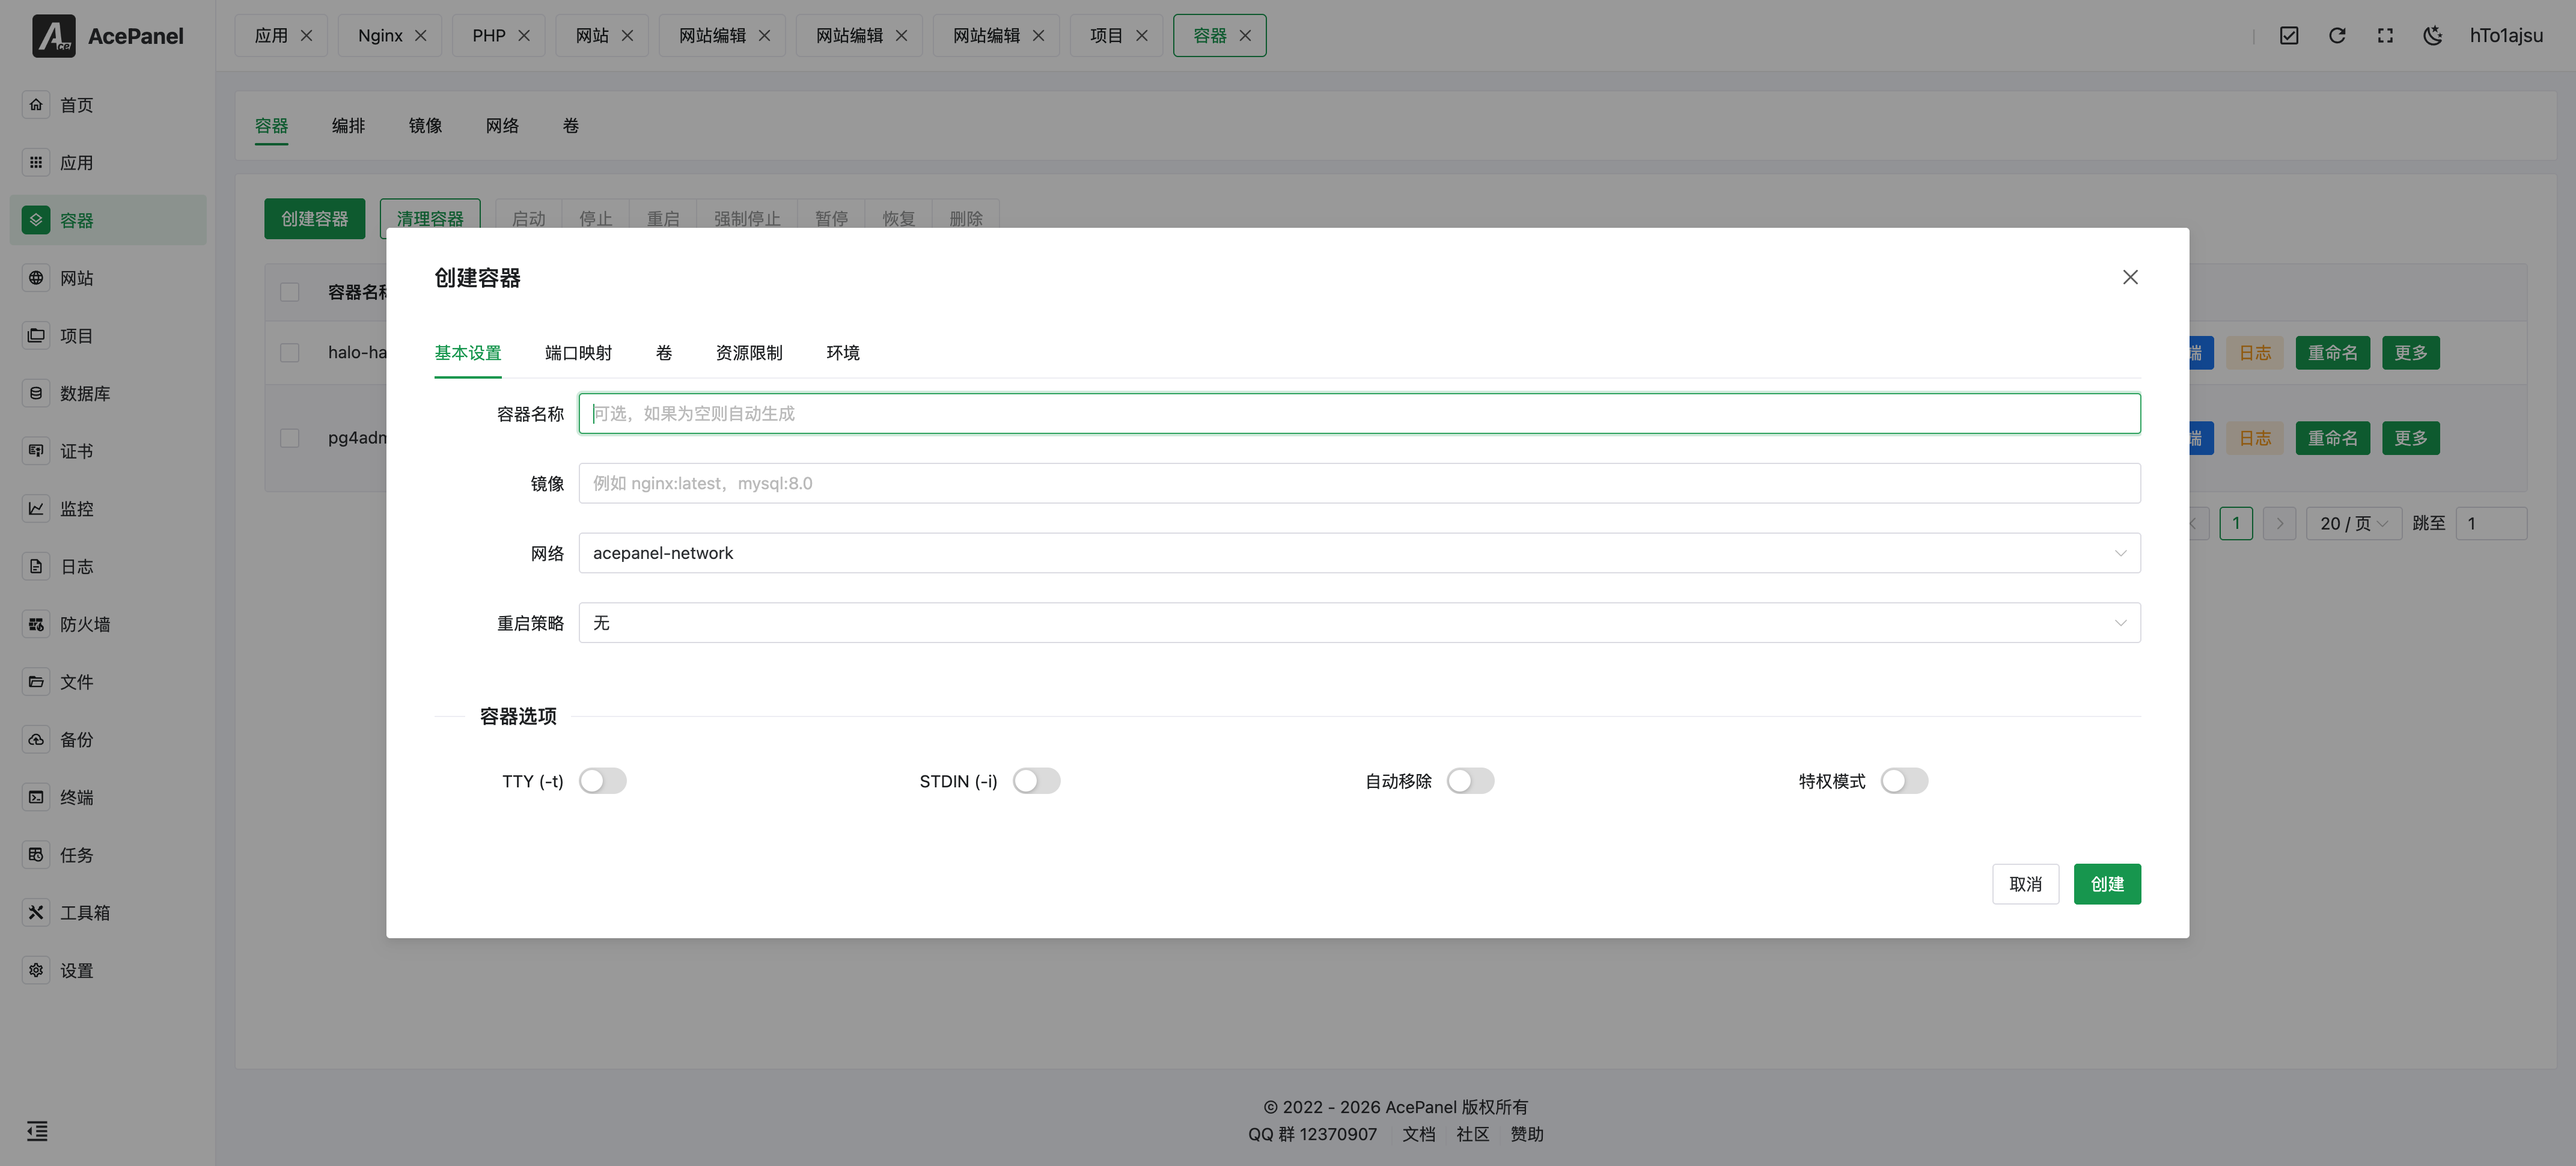
Basic Settings
- Container Name: Optional, auto-generated if left empty
- Image: Docker image name, e.g.,
nginx,mysql:8.4,your_username/your_image:tag - Network: Select the network for the container to use
- Restart Policy: Restart behavior after container exits
- None: Do not auto restart
- Always: Always restart
- On failure: Restart on failure (defaults to 5 retries)
- Unless stopped: Restart unless manually stopped
The Container Options section at the bottom of this tab provides the following switches:
- TTY (-t): Allocate a pseudo-TTY
- STDIN (-i): Keep STDIN open
- Auto Remove: Automatically delete container when stopped
- Privileged: Grant container full system privileges (use with caution)
Port Mapping
The Port Mode offers two options:
- Map Ports: Manually map container ports to host ports
- Expose All: Automatically map all exposed ports in the image to random host ports
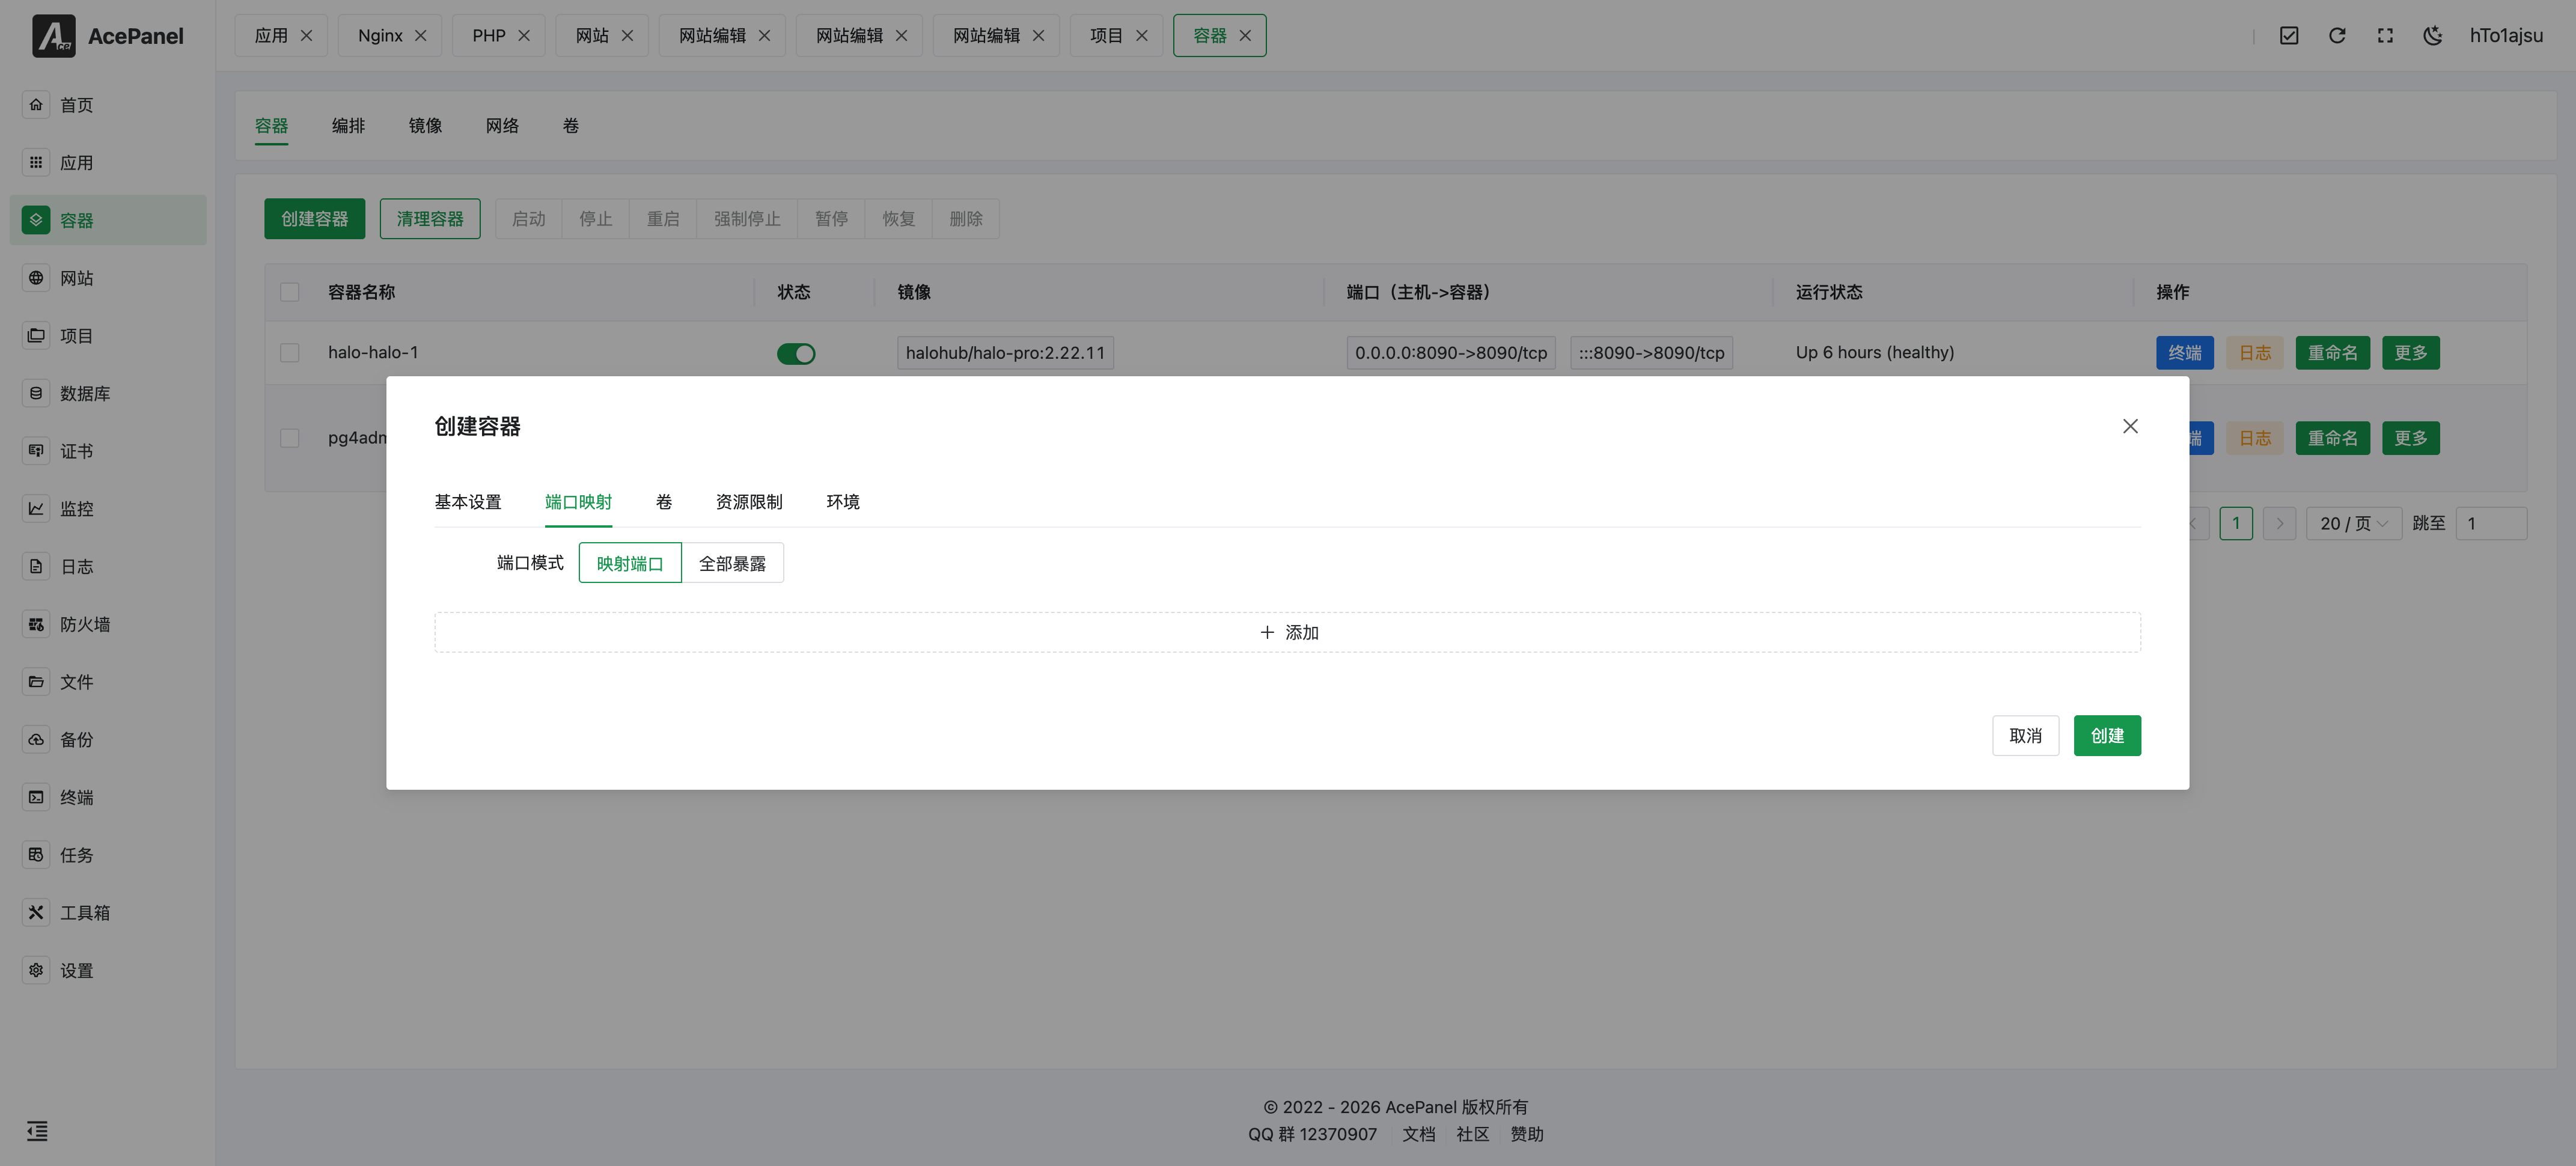
In Map Ports mode, each rule contains an optional bind IP, a host port range (start/end), a container port range (start/end), and a protocol (TCP or UDP). To map a single port, set the start and end values to the same number.
For example, mapping host port 8080 to container port 80 means setting the host start/end to 8080 and the container start/end to 80.
Volume Mounts
Mount host directories or data volumes to the container. Each mount consists of a host path, a container path, and an access mode (Read-Write or Read-Only). Use absolute paths for host directories.
For example, mounting the host's /opt/ace/data directory to the container's /data directory.
Resource Limits
Limit the resources the container can use. Set a value to 0 for no limit:
- Memory (MB): Maximum memory the container can use, in MB
- CPU Cores: Number of CPU cores the container can use (e.g.,
0.5means half a core) - CPU Shares: Relative CPU weight (default
1024); higher values get more CPU time when competing
Environment
In the Environment tab you can set the following:
- Environment Variables: Container environment variables in
KEY=VALUEform - Startup Commands: Override the image's default Command (CMD) and Entrypoint (ENTRYPOINT)
- Container Labels: Custom labels attached to the container in
KEY=VALUEform
Container Operations
Batch Operations
After selecting multiple containers, you can perform batch operations:
- Start: Start selected containers
- Stop: Stop selected containers
- Restart: Restart selected containers
- Force Stop: Force stop selected containers
- Pause: Pause selected containers
- Resume: Resume paused containers
- Delete: Delete selected containers
Single Container Operations
- Terminal: Open the container's terminal to execute commands inside the container (available only when the container is running)
- Logs: View container runtime logs
- Rename: Modify container name
- More: A dropdown with Start, Stop, Restart, Force Stop, Pause, Resume, and Delete actions
Cleanup Containers
Click Cleanup Containers to delete all stopped containers and free up system resources.
Note
The cleanup operation cannot be undone. Please ensure stopped containers are no longer needed.