Webhook
Webhooks allow you to trigger script execution on the server through HTTP requests, enabling automated deployment, CI/CD integration, and other features.
Create Webhook
Click the Create Webhook button and fill in the following information:
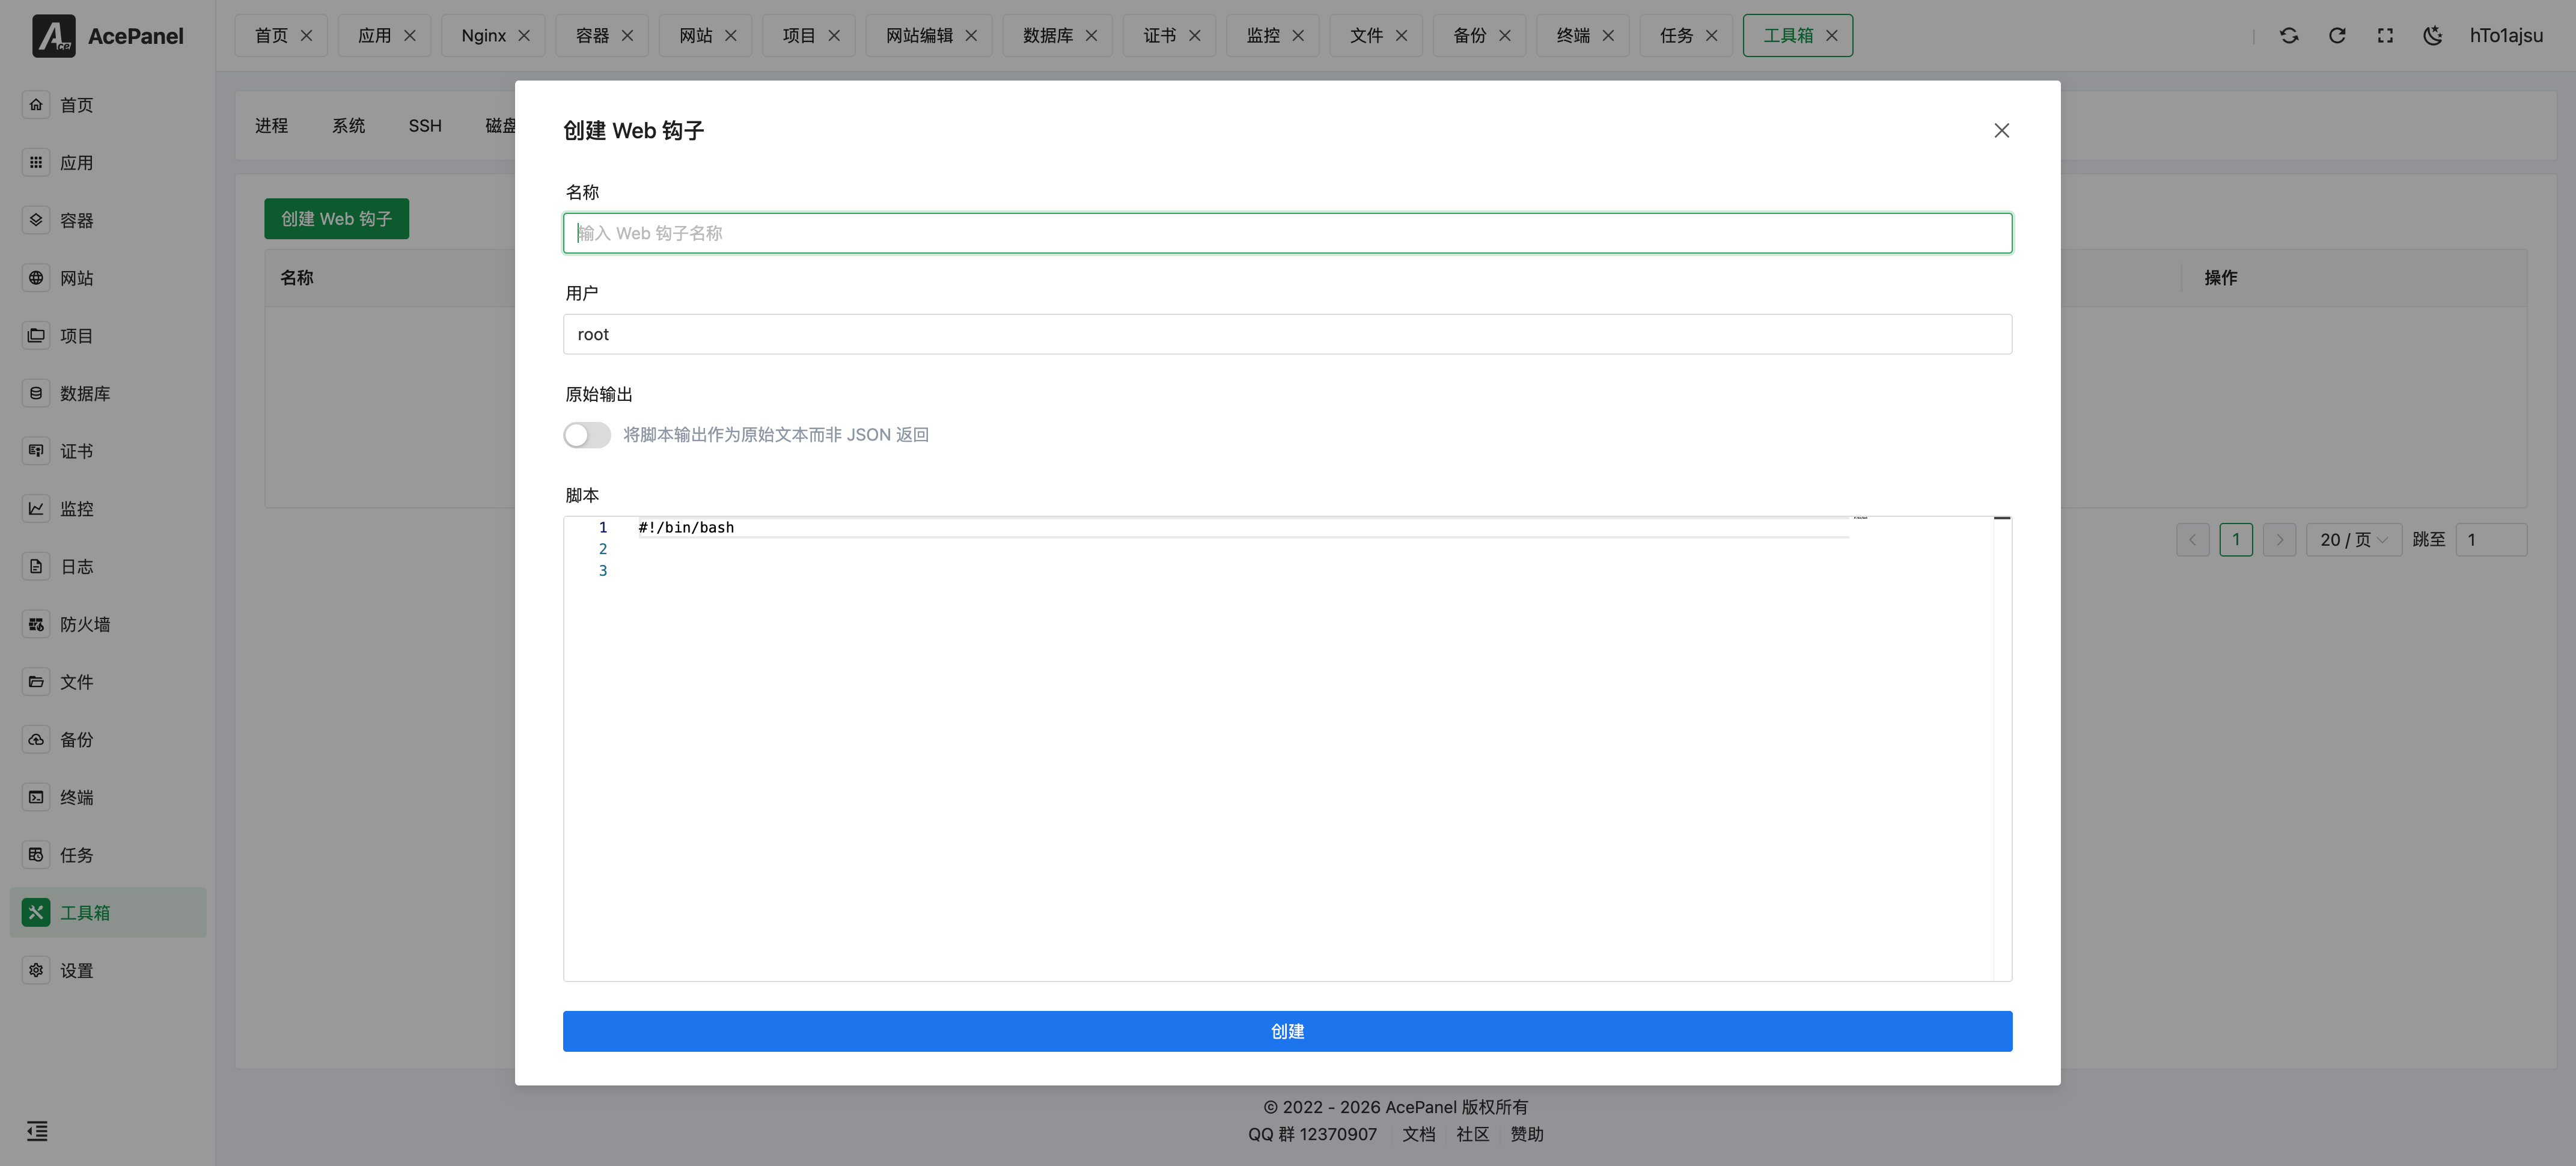
- Name: The name of the webhook, used to identify its purpose
- User: The system user that executes the script, default is root
- Raw Output: When enabled, returns the raw output of the script; when disabled, returns JSON format
- Script: The Shell script content to execute. The form is pre-filled with a
#!/bin/bashtemplate by default
When you create a webhook, the script content is saved as a standalone .sh file (mode 0755) under the server/webhook directory of the panel data root, named after the generated Key. Deleting the webhook also removes this script file.
The script is executed via bash. When the configured user is root (or left empty), it runs directly as the panel process owner; for any other user, it is executed as that user using su -s /bin/bash -c, so make sure the target user exists and has permission to run the script.
Usage
After creation, the system will generate a unique Key. Access the following URL to trigger script execution:
https://your-panel-domain/webhook/{key}Supports both GET and POST requests. You can also use the Copy URL button in the list to copy the full call URL directly.
Edit Webhook
Click the Edit button on a row to modify an existing webhook. The edit dialog exposes the same Name, User, Raw Output, and Script fields as the create form, plus an additional Enabled switch so you can toggle the webhook on or off directly while editing. Saving rewrites the underlying script file and updates the stored configuration; the Key remains unchanged.
Actions
Each row in the list provides the following actions:
| Action | Description |
|---|---|
| Copy URL | Copies the full call URL ({panel-origin}/webhook/{key}) to the clipboard |
| Edit | Opens the edit dialog to modify the webhook |
| Delete | Deletes the webhook after a confirmation dialog; this also removes the corresponding script file |
In addition, the Enabled column shows a switch you can toggle directly in the list to enable or disable a webhook without opening the edit dialog.
Use Cases
Git Auto Deployment
Combined with GitHub/GitLab Webhook functionality, achieve automatic deployment after code push:
#!/bin/bash
cd /opt/ace/projects/myproject
git pull origin main
npm install
npm run build
Scheduled Task Trigger
Trigger specific operations through external services (such as monitoring systems):
#!/bin/bash
# Clean temporary files
rm -rf /tmp/cache/*
# Restart service
systemctl restart myapp
CI/CD Integration
Call Webhook in CI/CD pipeline to complete deployment:
# In CI script
curl -X POST https://panel.example.com/webhook/your-key
List Description
| Field | Description |
|---|---|
| Name | Webhook name |
| Key | Unique identifier, used to build the call URL |
| Run As User | System user that executes the script |
| Raw Output | Whether to return raw text output |
| Enabled | Whether the webhook is enabled |
| Call Count | Cumulative number of calls |
| Last Call | Last call time |
| Creation Time | Time the webhook was created |
Notes
- The Key is sensitive information, do not disclose it to untrusted people
- Scripts are executed as the specified user, pay attention to permission control
- It is recommended to add necessary error handling in scripts
- You can temporarily disable a webhook using the disable switch