Container Templates
Container templates provide Docker-based one-click deployment solutions for quickly deploying various common applications without manual configuration.
Prerequisites
Before using container templates, you need to install Docker first:
- Go to Applications > Native App
- Find Docker, click Install
- Wait for installation to complete
Template List
Go to the Applications page, click the Container Template tab to view available templates:
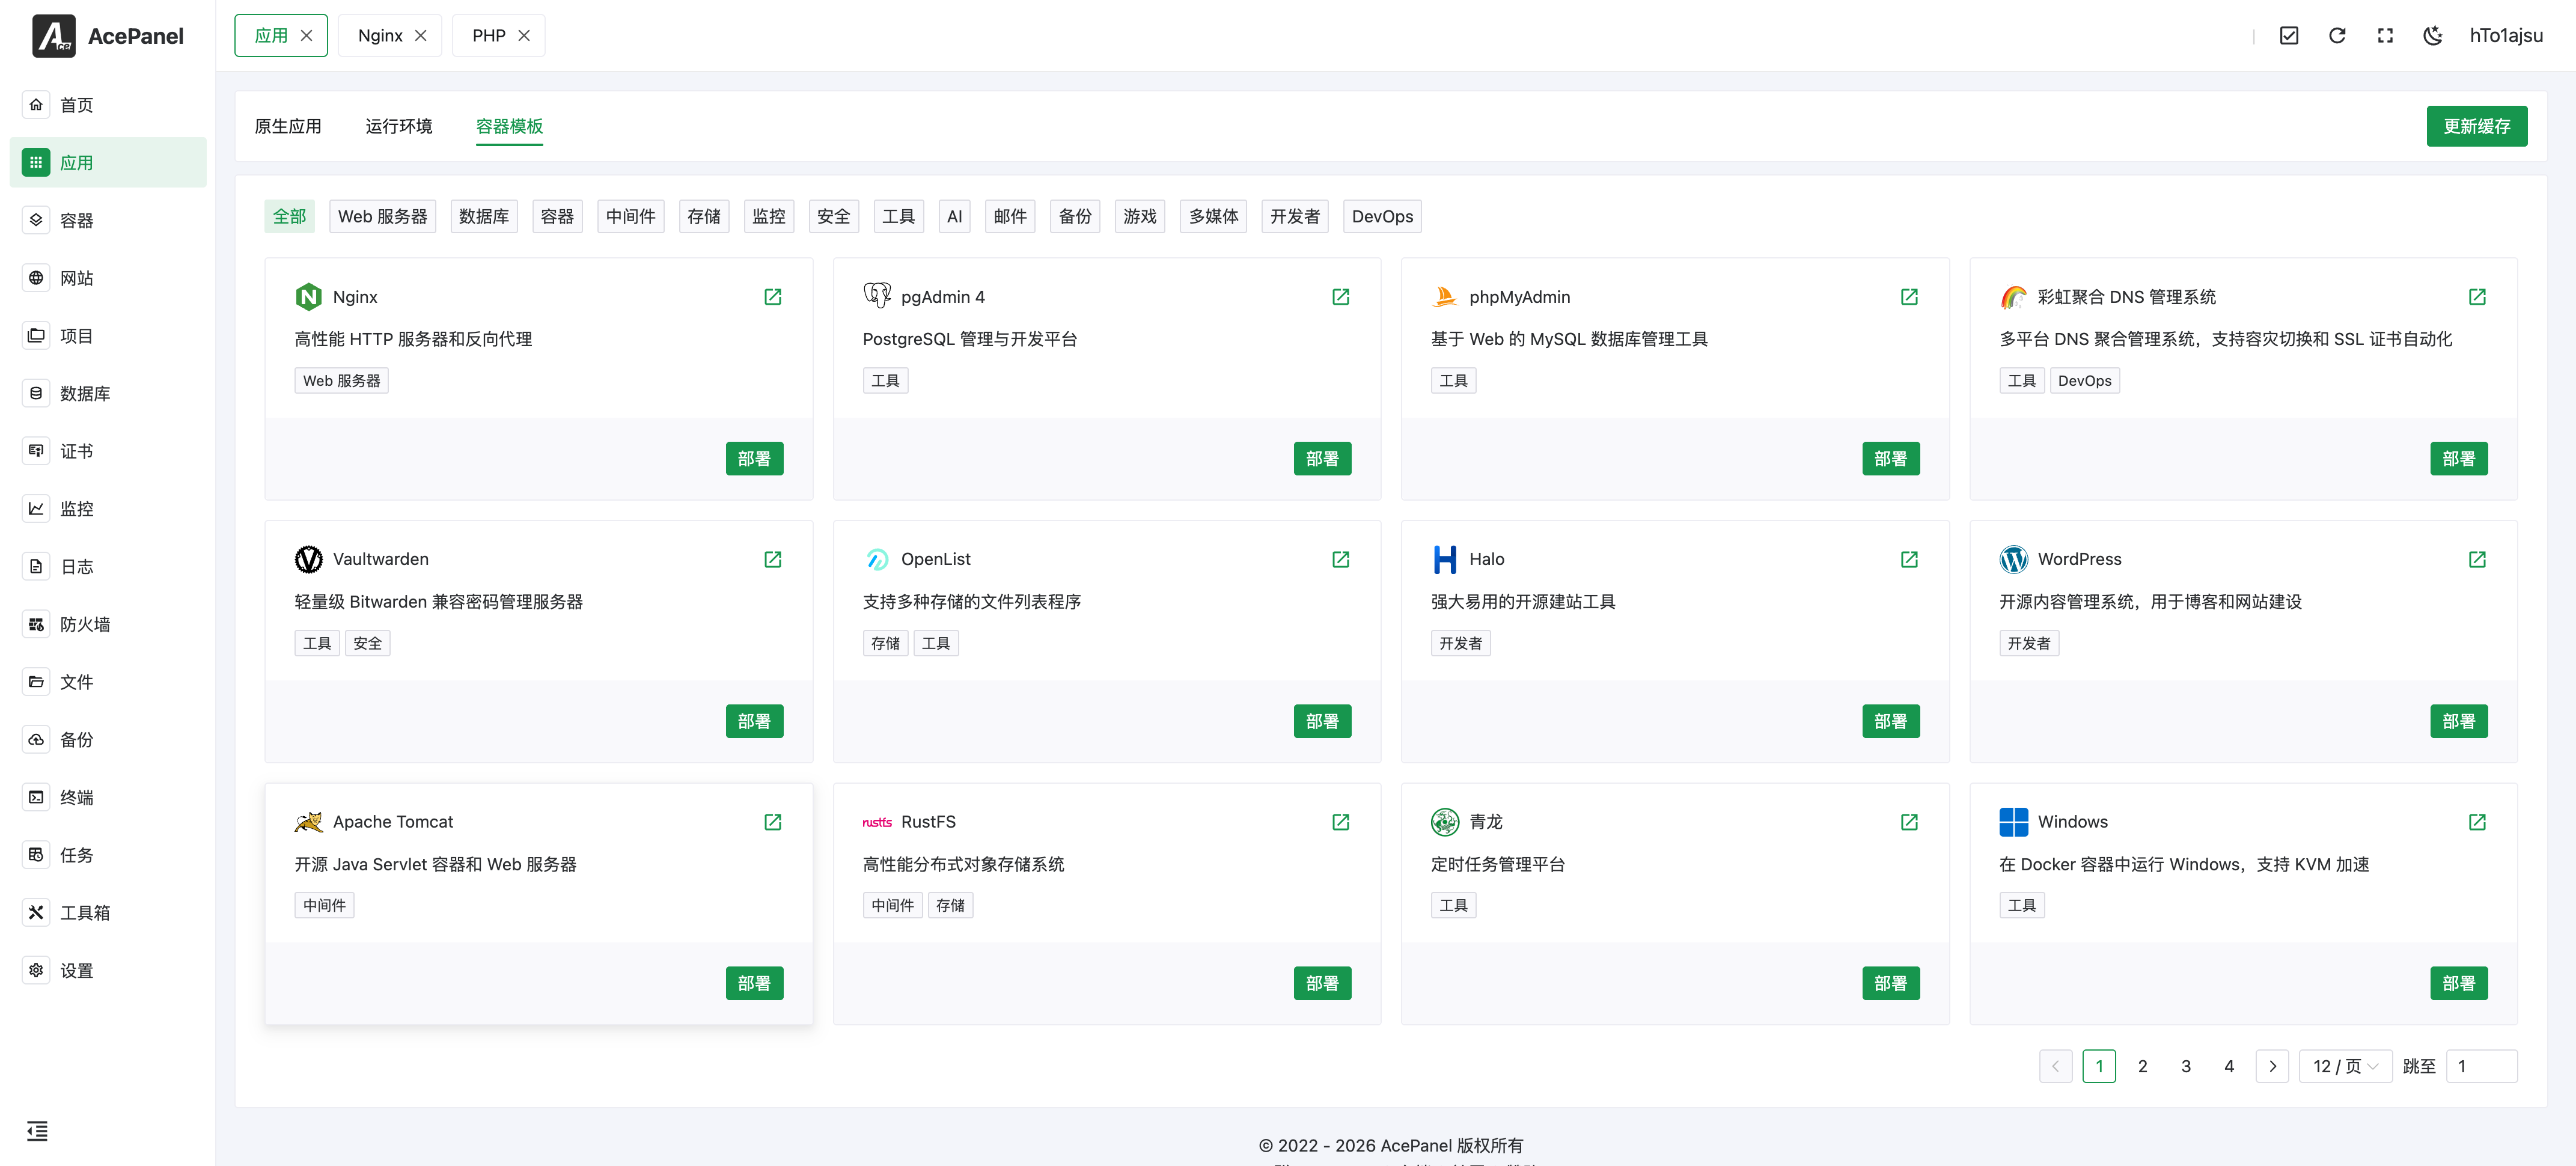
You can filter templates by category tags or search by name, description, or website. Templates loaded from the local panel/storage/templates directory are shown with a Local tag. If a local template and a remote template share the same slug, the local one takes precedence.
Deploy Application
Click the Deploy button on the template card to start the deployment wizard.
Step 1: Select Deployment Mode
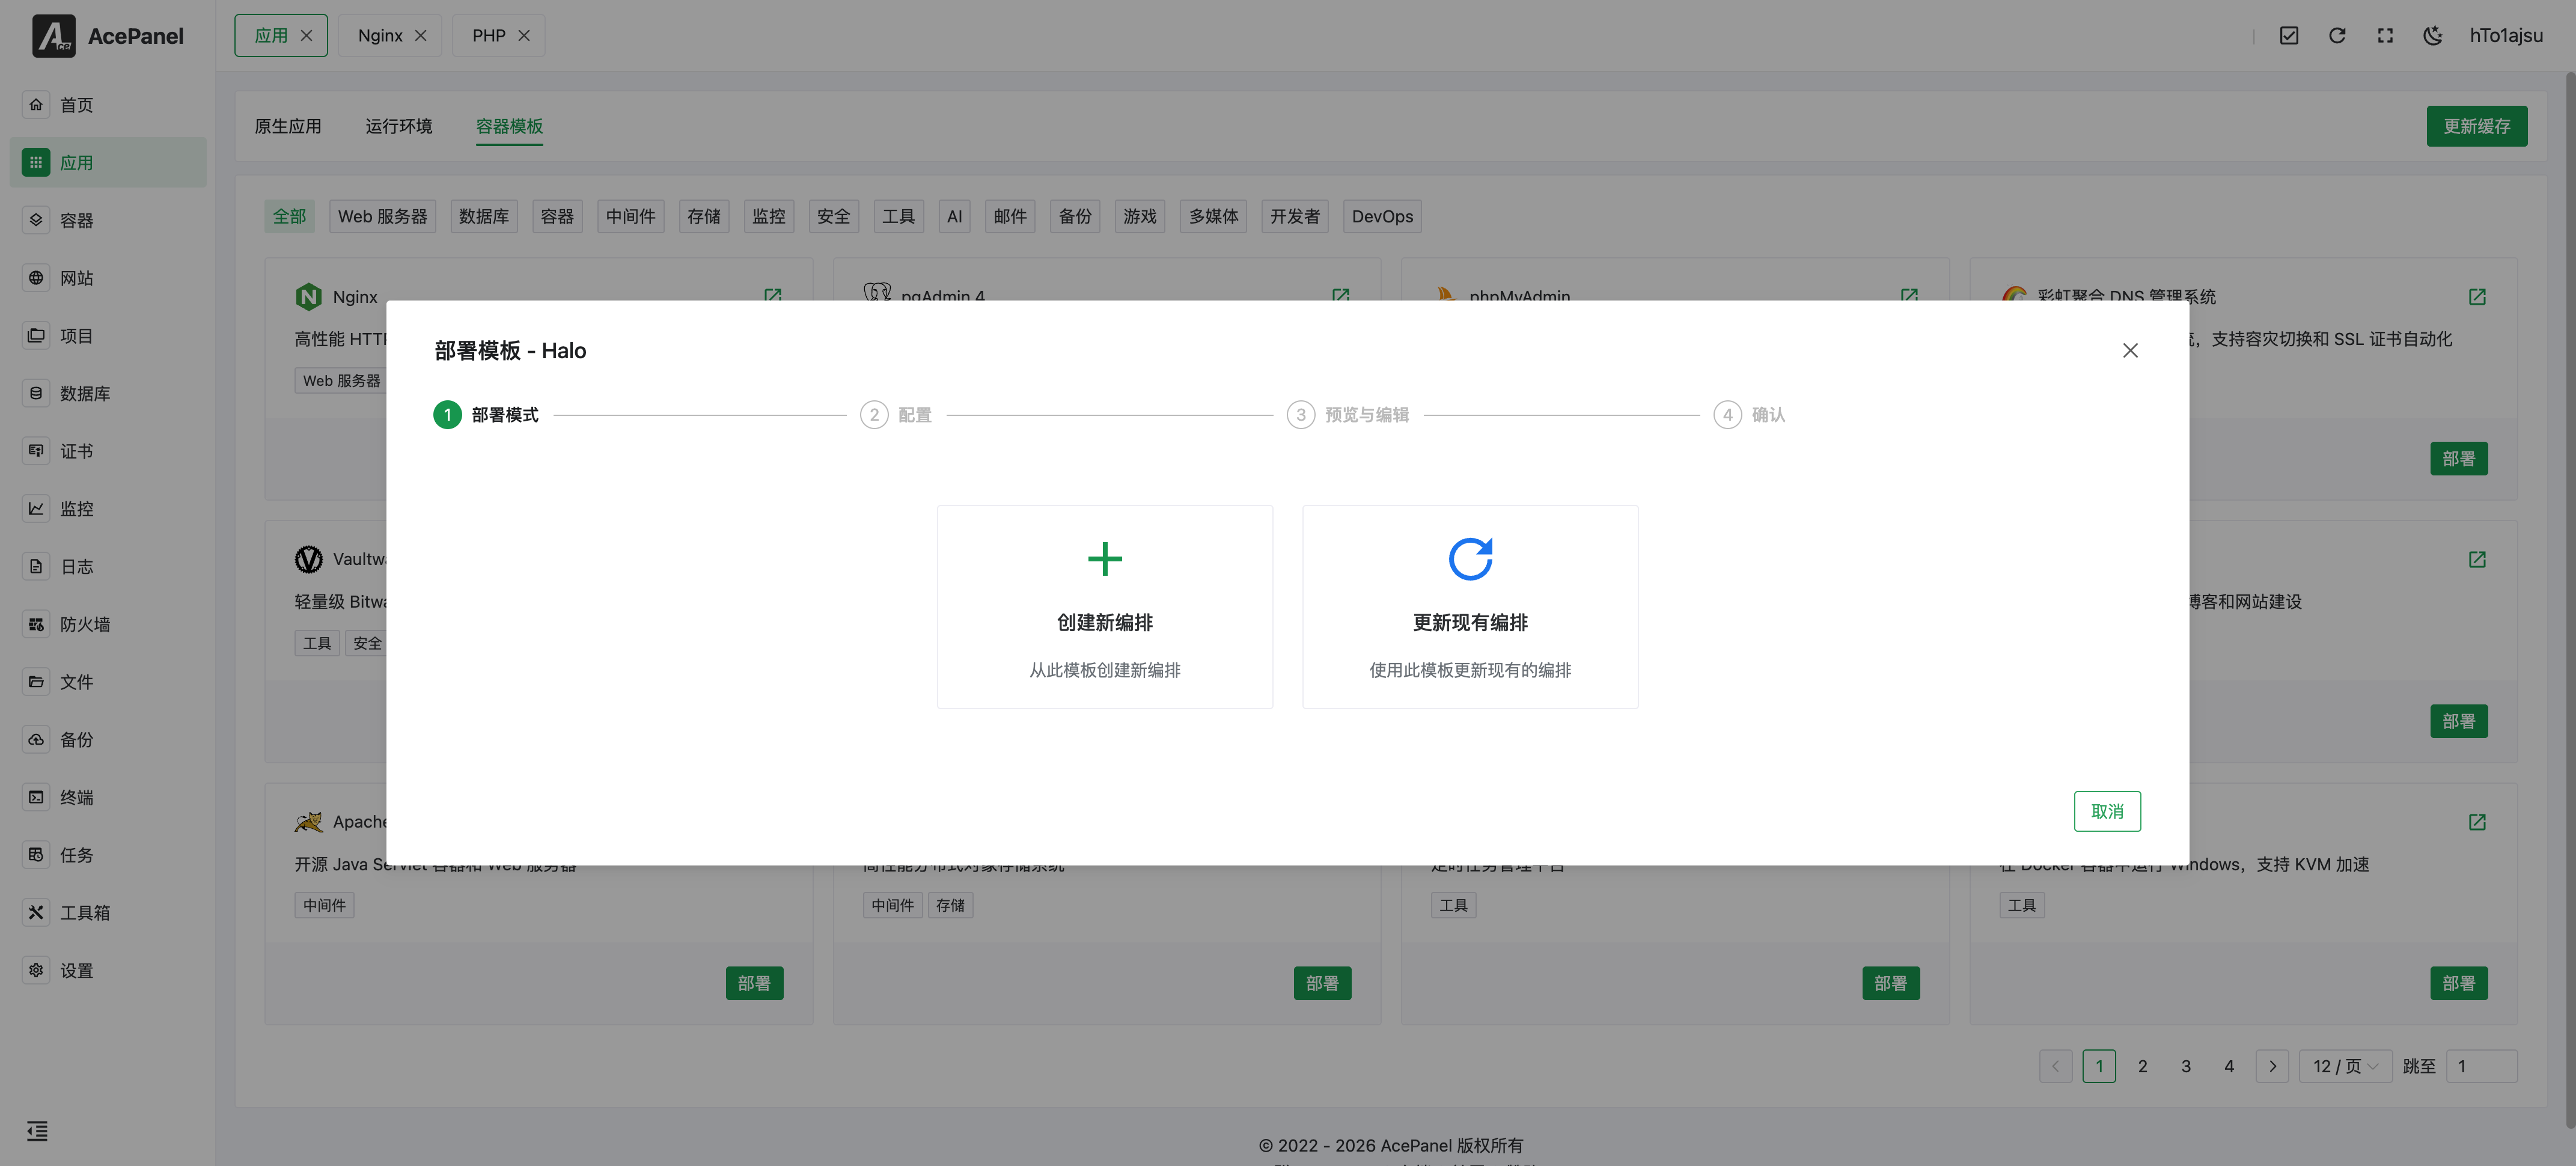
- Create New Compose: Create a new Docker Compose from the template
- Update Existing Compose: Use the template to update an existing compose configuration
Step 2: Configure Parameters
Fill in configuration information according to application requirements:
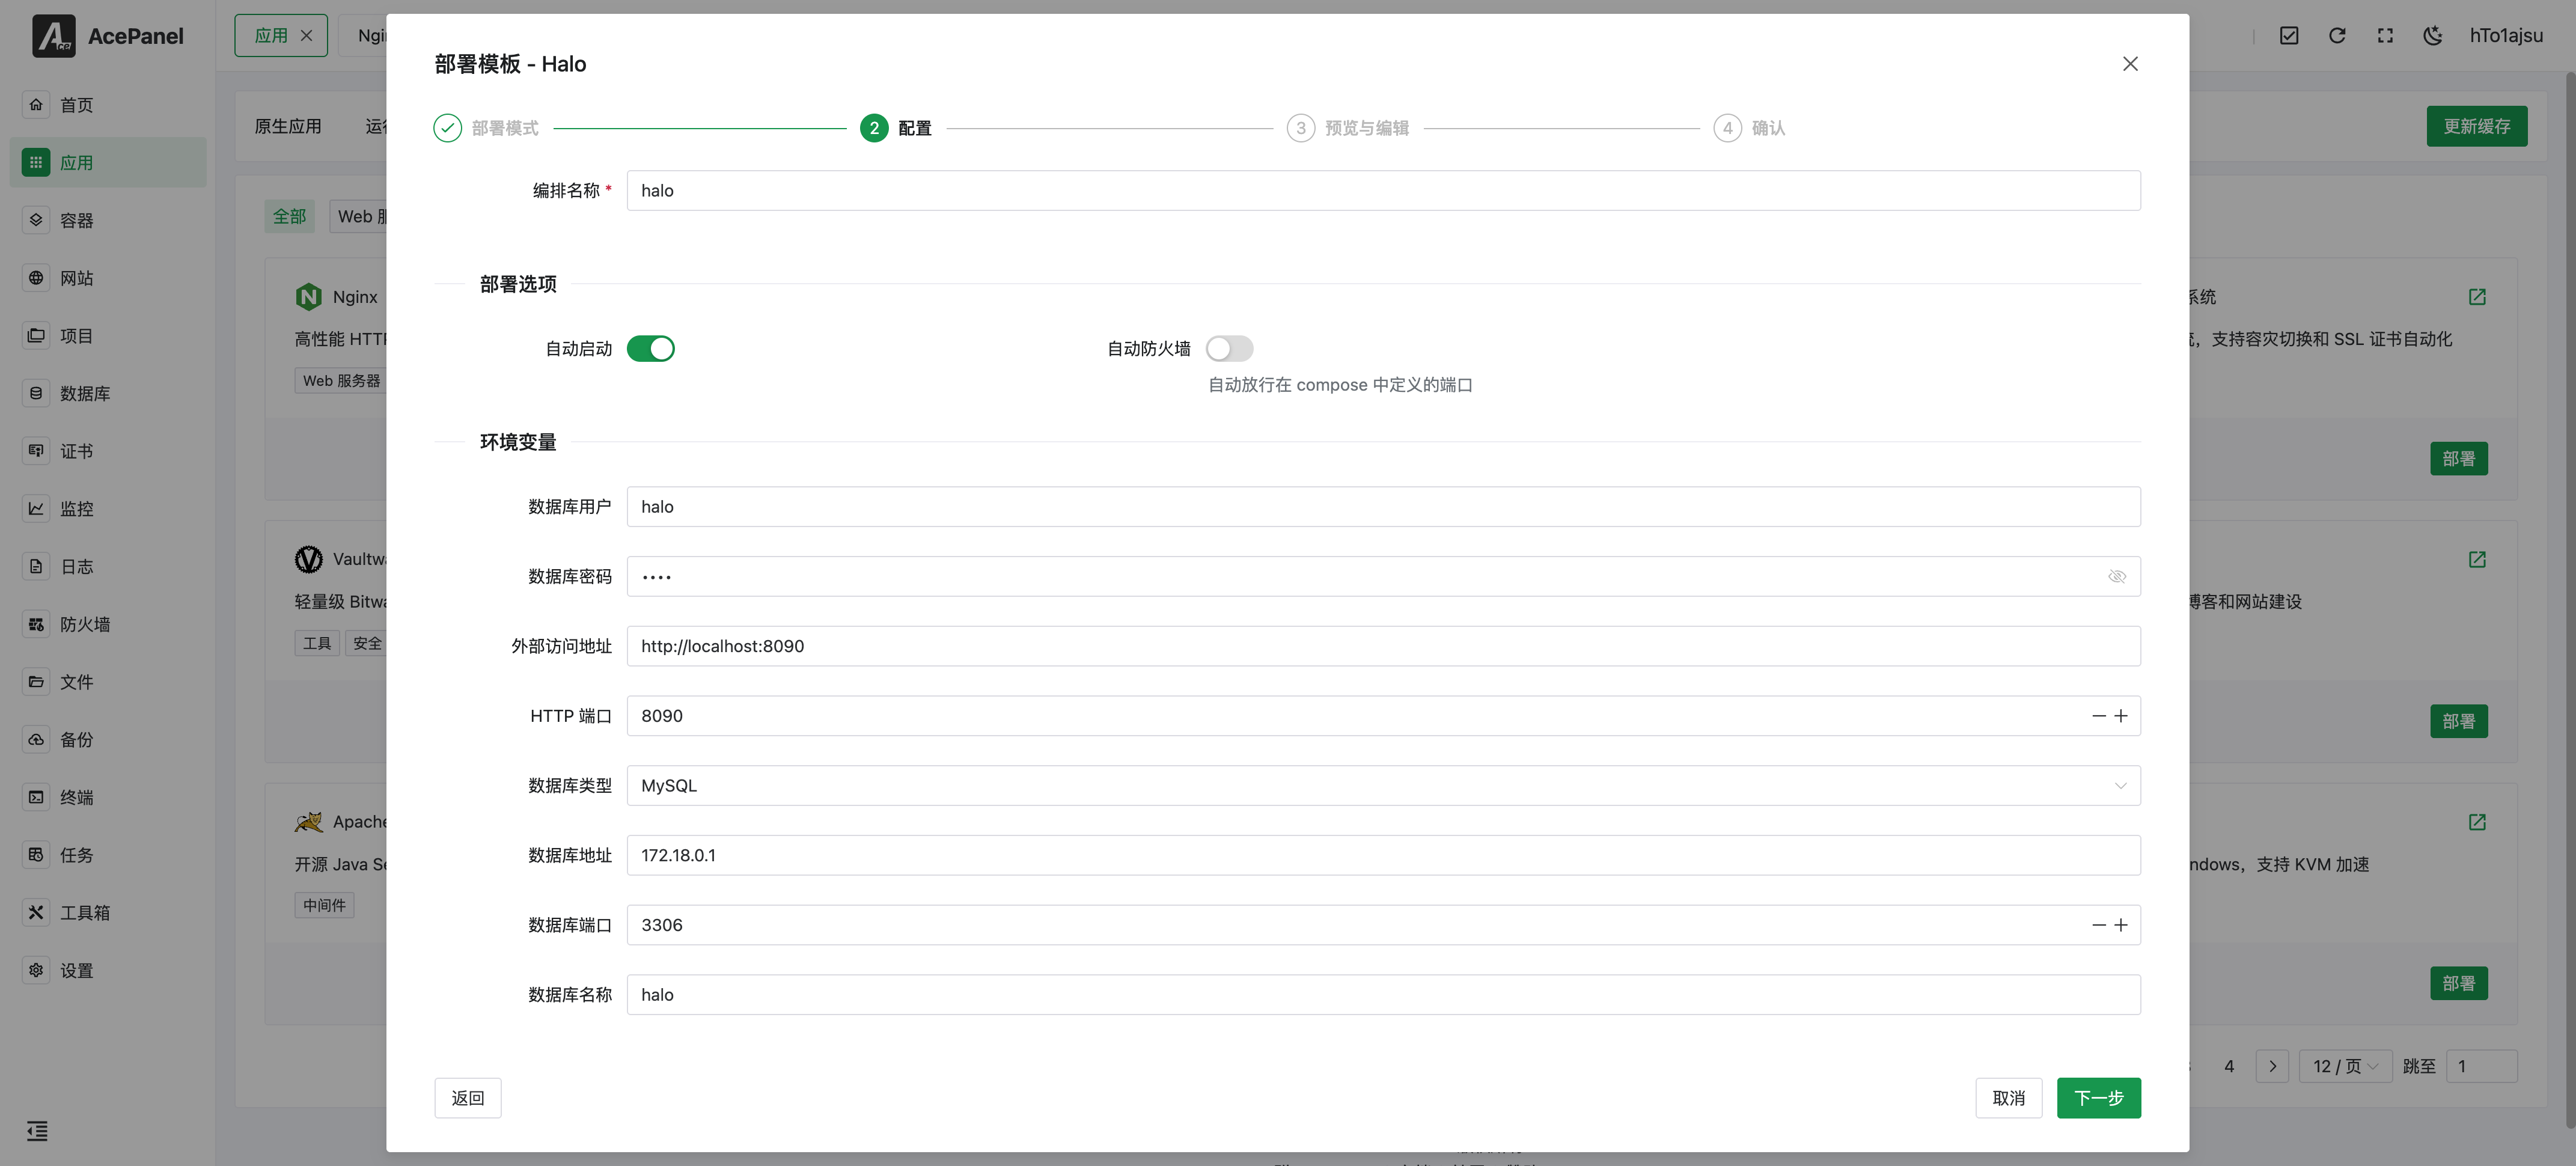
Common configuration items:
- Compose Name: Used to identify this deployment (create mode only; in update mode you select an existing compose instead)
- Auto Start: Whether to automatically start containers after creation
- Auto Firewall: Whether to automatically allow the ports defined in the compose file (create mode only). The panel scans the
ports:entries of the compose (formats such as"8080:80","8080:80/tcp", or"80/udp") and opens each host-side port for inbound traffic over the matching protocol (TCP by default, UDP when/udpis specified). Only ports in the range 1–65535 are processed. - Environment Variables: Each template defines its own variables (such as database username, password, and listening port). Variables without a default value are required.
Each environment variable is rendered as an input control according to its declared type:
| Type | Control |
|---|---|
text | Single-line text input (default when no type is specified) |
password | Password input with a show/hide toggle |
number | Numeric input |
port | Numeric input constrained to the range 1–65535 |
select | Dropdown built from the variable's predefined options |
url | Text input validated as a URL (a value that is not a valid URL is rejected) |
In update mode, after you select an existing compose its current .env values are loaded and used to pre-fill the environment-variable fields whose names match the variables declared by the template. Values for number and port fields are converted to numbers automatically.
Step 3: Preview and Edit
Preview the generated Docker Compose configuration file:
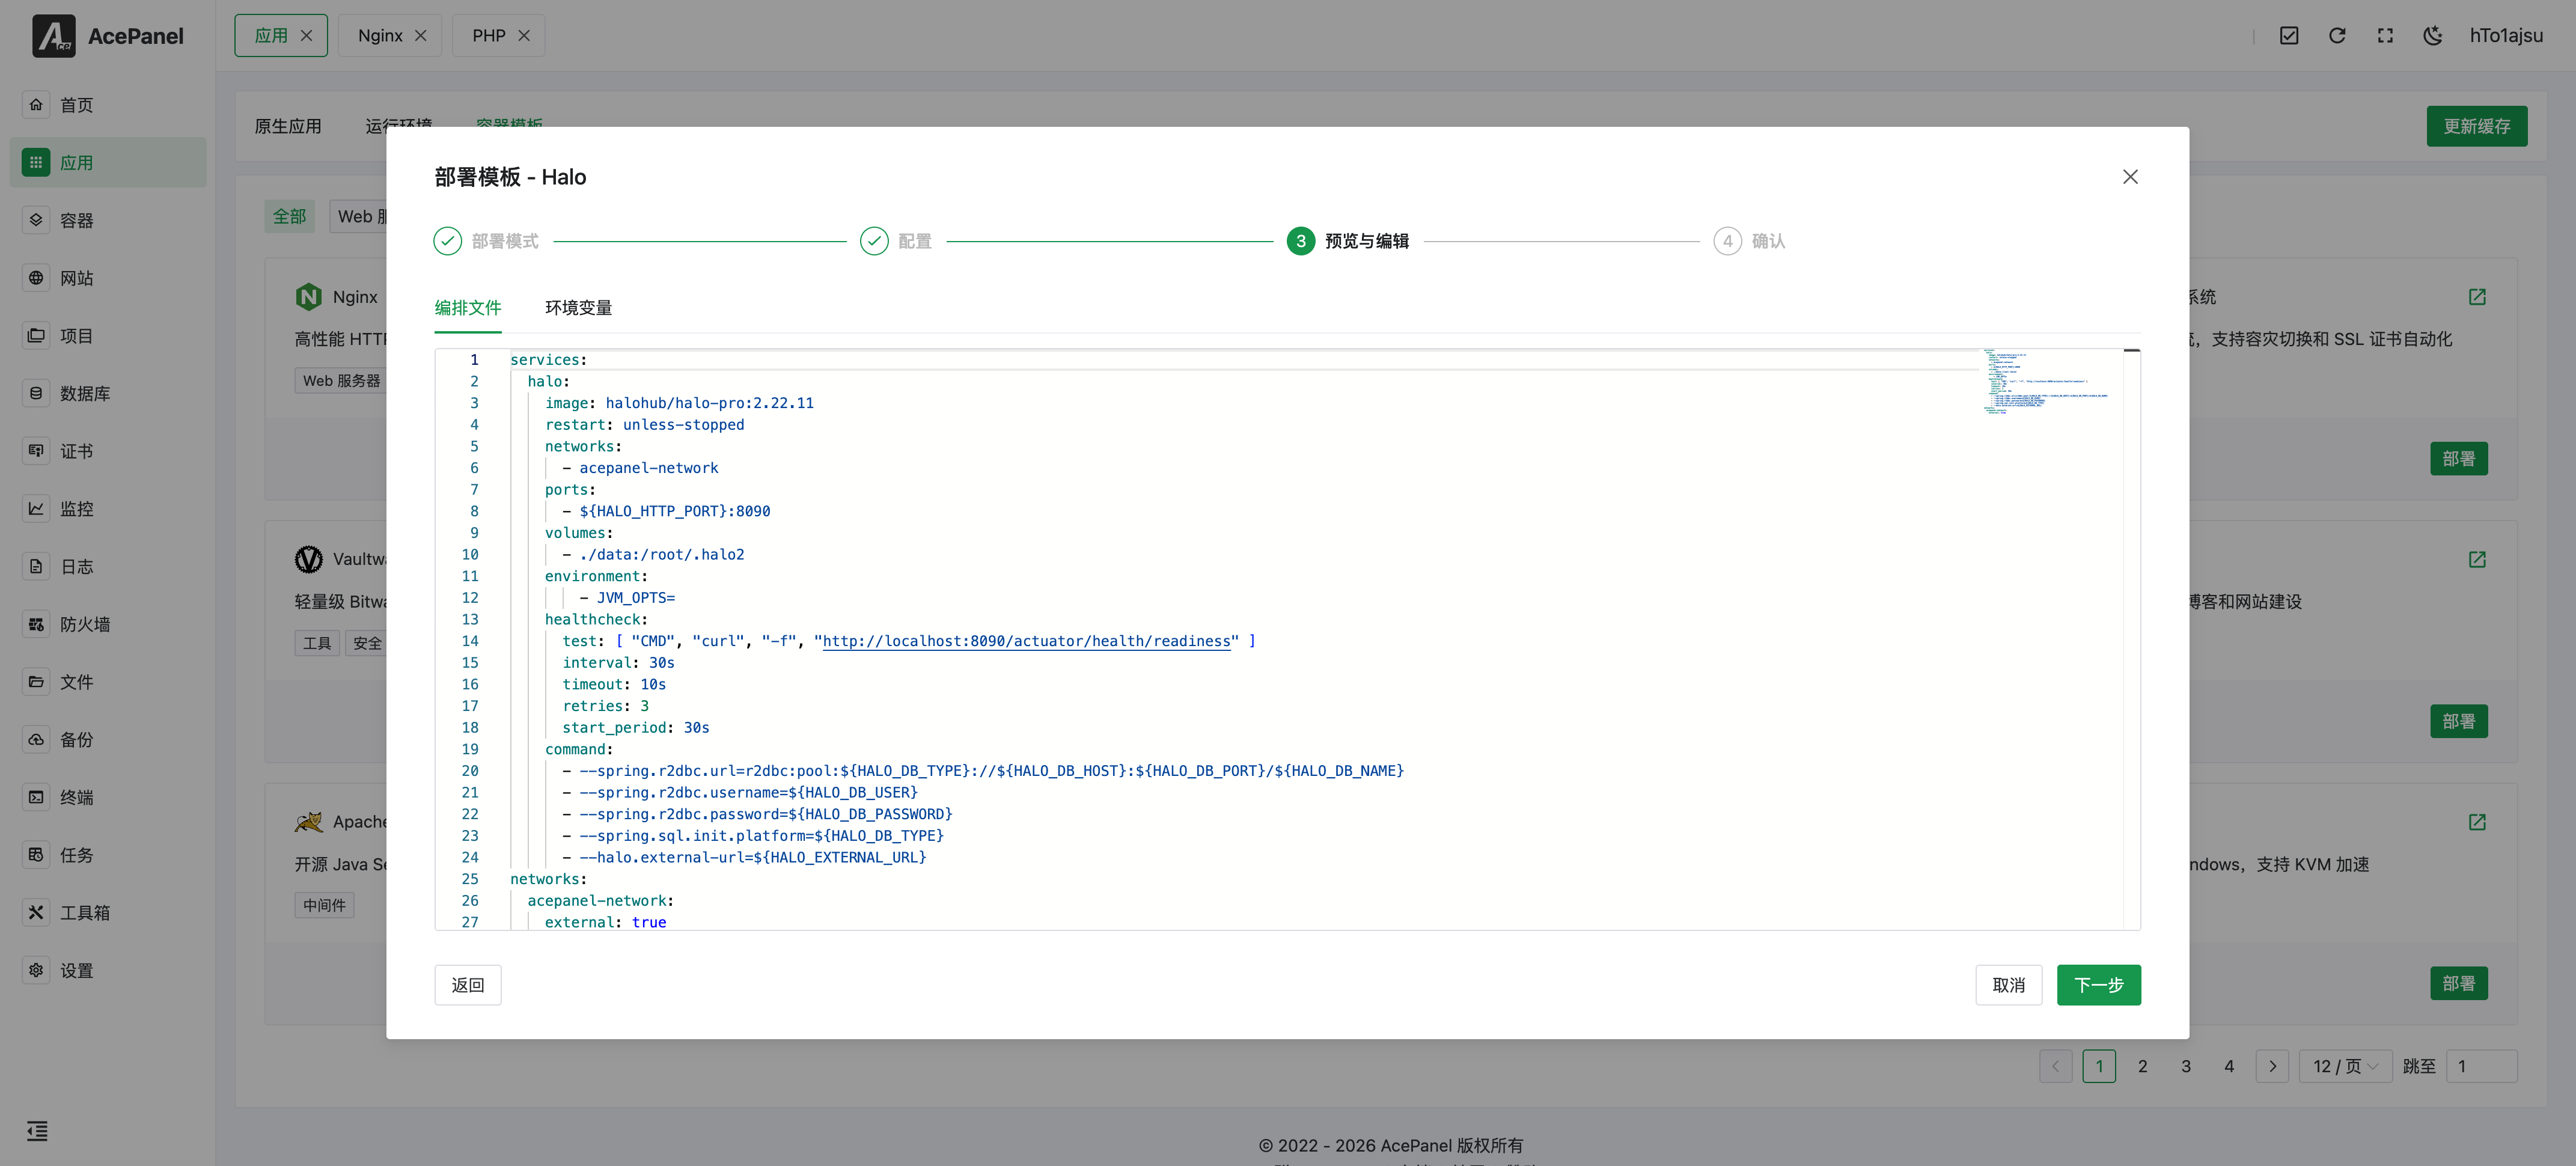
Here you can:
- View and edit the Compose File (docker-compose.yml). In update mode this is a diff editor: the left side shows the original compose and the right side shows the new compose, which you can edit.
- View and edit Environment Variables
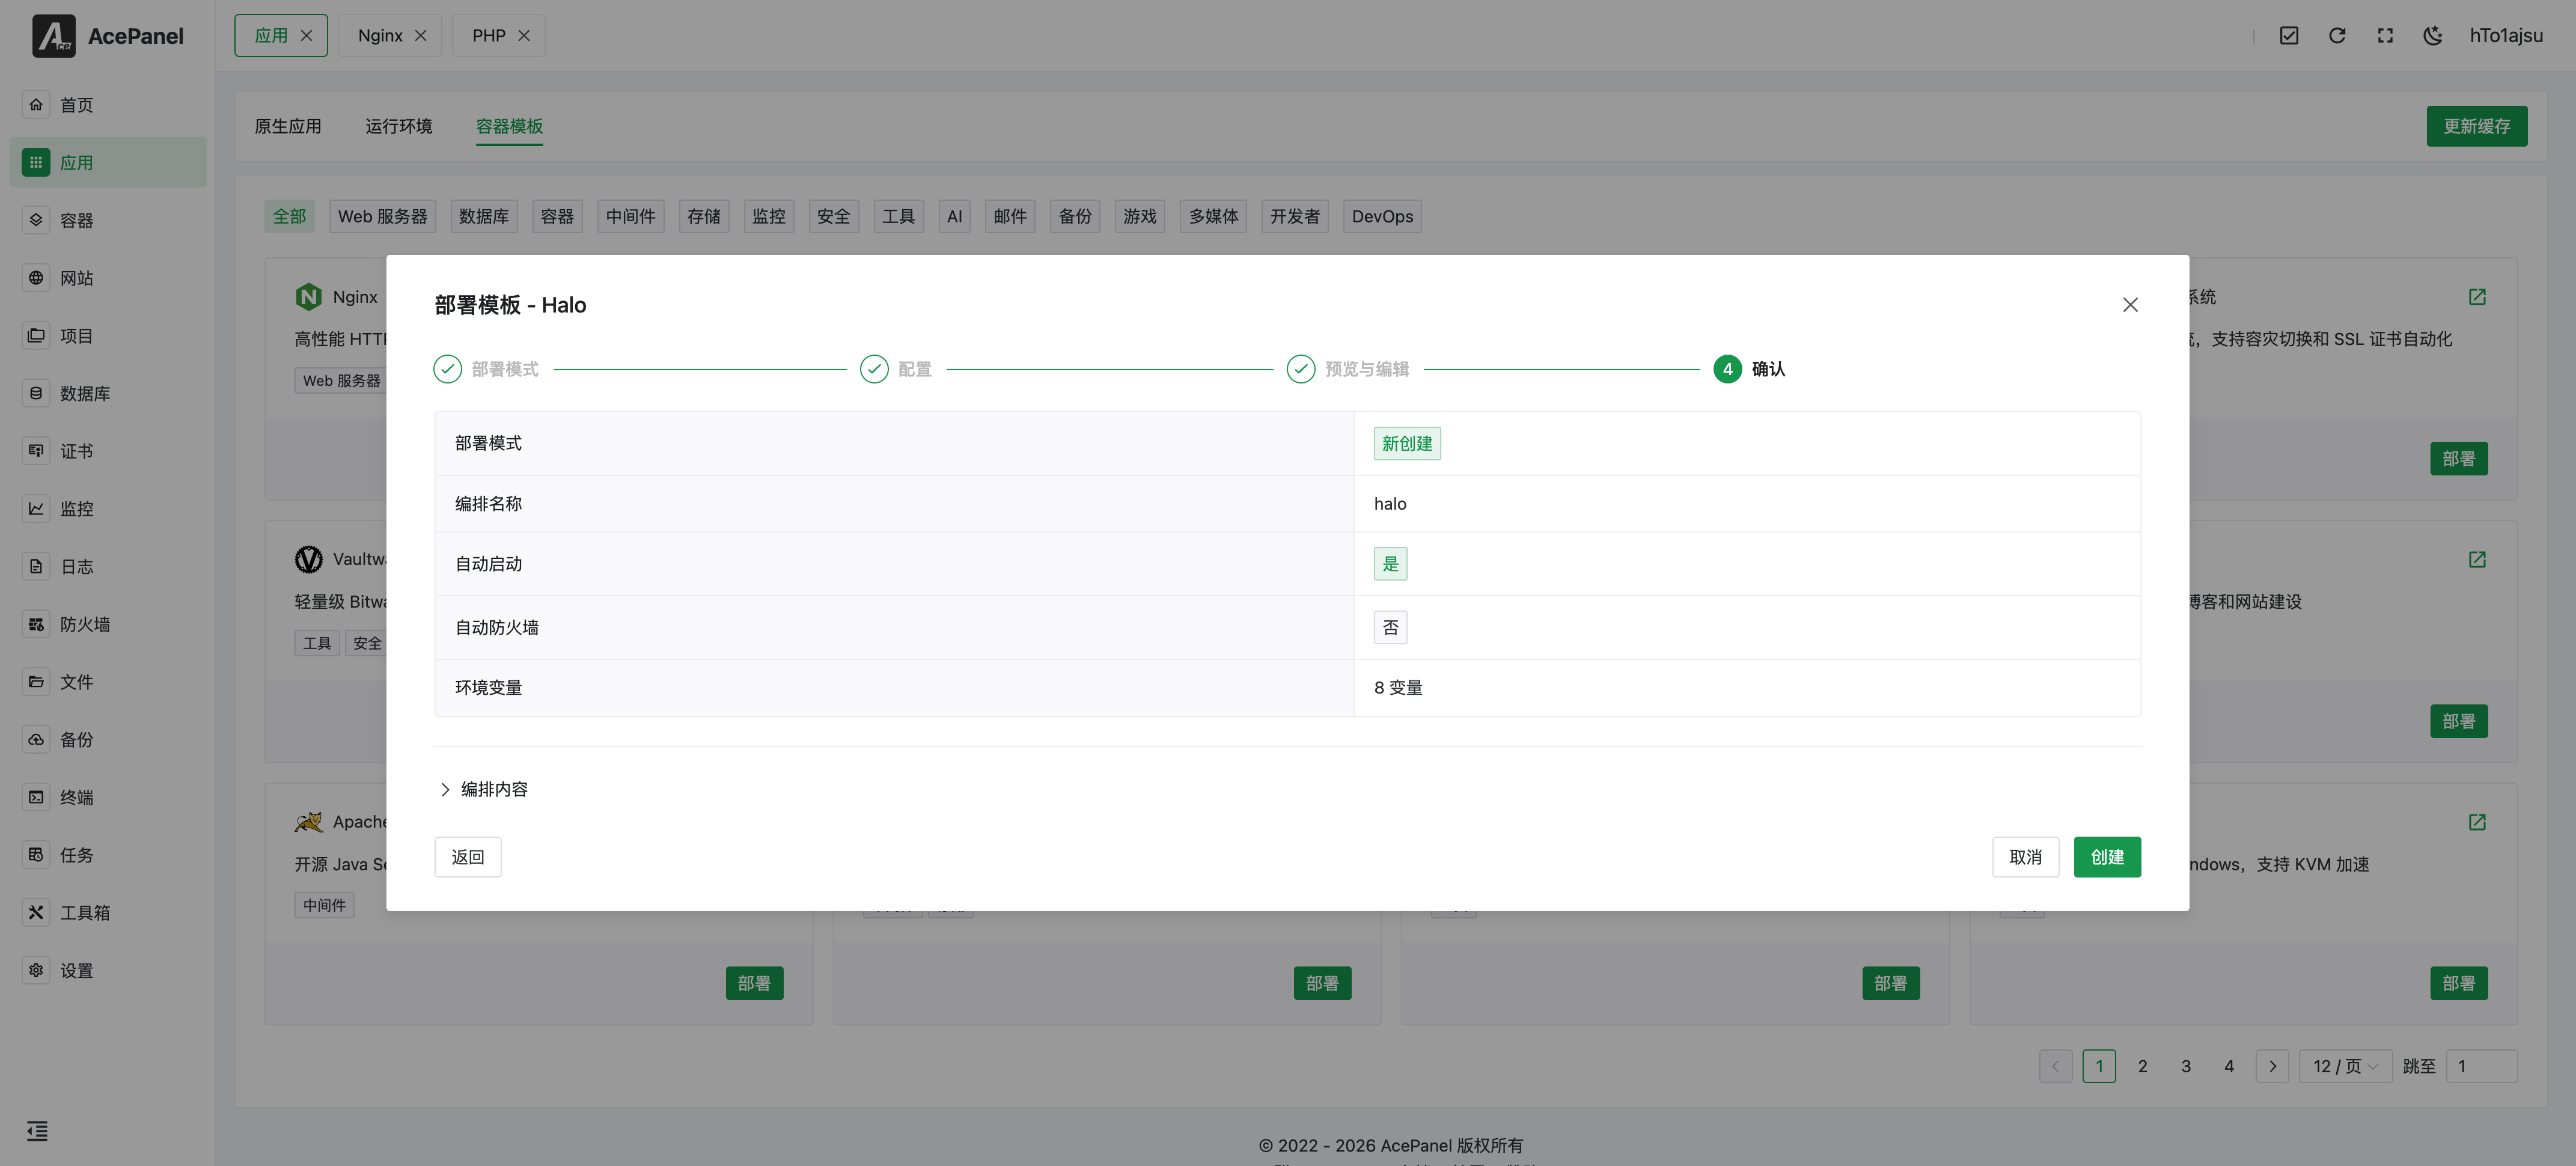
Step 4: Confirm Deployment
This step shows a summary of your choices: the deploy mode, compose name, whether Auto Start is enabled, whether Auto Firewall is enabled (create mode only), and the number of environment variables. You can expand Compose Content to review the final, read-only compose one more time.
After confirming all configurations are correct, click Create (or Update in update mode) to complete deployment:
In create mode the panel writes the deployment to <root>/compose/<name>/, generating both a docker-compose.yml and a .env file built from your environment variables. You can later edit either file from the Containers > Compose page.
If Auto Start is enabled, a terminal window opens and runs docker compose -f <dir>/docker-compose.yml up -d to start the containers; you can watch the startup output in real time.
After deployment, the application will appear in the Containers > Compose page for management.
Template vs Manual Deployment
| Feature | Using Template | Manual Deployment |
|---|---|---|
| Configuration Difficulty | Simple, just fill in basic information | Need to write docker-compose.yml |
| Flexibility | Uses preset configuration | Fully customizable |
| Use Cases | Quick deployment of common applications | Special requirements, custom configuration |
Common Template Descriptions
WordPress
Open-source blog and content management system, suitable for building personal blogs or corporate websites.
pgAdmin 4
Graphical management tool for PostgreSQL databases.
phpMyAdmin
Graphical management tool for MySQL/MariaDB databases.
Vaultwarden
Lightweight password management server, compatible with Bitwarden clients.
Qinglong
Scheduled task management platform, supporting Python, JavaScript, Shell, and other scripts.
OpenList
Multi-storage aggregation file listing program, supporting Alibaba Cloud Drive, OneDrive, etc.
Update Cache
If the template list is incomplete or you need to get the latest templates, click the Update Cache button at the top of the page to refresh the template list.